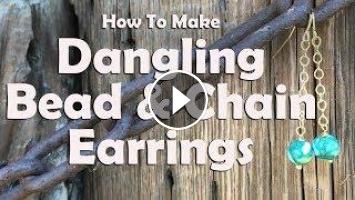
How To Make Dangling Bead And Chain Earrings
Hi! We're Jennifer and Kitty, The O'Neil Sisters. Thanks for coming to our YouTube channel! We also have a blog: www.RunningWithSisters.com. It is loaded with DIY crafts, jewelry tutorials, and all kinds of gift crafts to make. Click SHOW MORE to see details about this project.
The complete written instructions for these Chain Tassel Earrings are on our blog: http://runningwithsisters.com/bead-and-chain-earrings
Let’s stay in touch!
Twitter: https://twitter.com/ONeilSisters
Facebook: https://www.facebook.com/TheONeilSisters
Instagram: https://www.instagram.com/oneilsisters/
Pinterest: https://www.pinterest.com/oneilsisters/
How To Make Dangling Bead And Chain Earrings
by Jennifer and Kitty O'Neil
The O'Neil Sisters
Running With Sisters
Transcript (abridged)
To make the earrings you'll need two eight millimeter round beads, two inches of gold loop chain, two head pins, also gold, and two earring wires in gold. For tools, you need round-nose pliers and wire cutters. To get started we're going to take our length of chain here. And for this design we're going to use six of the large links in the chain for each earring. So I'm going to count six lengths of the large loop. So what I want to do to cut the chain is cut right through the link that's underneath the number six loop. I'm just using my wire cutters and cutting that. And now to make the earring, I'm going to feed a bead onto one of our head pins. Actually it looks like the hole in my bead is larger than the little flat end of my head pin. So it's an easy mistake to fix. We're going to use a tiny little gold bead. Slide that onto our head pin and what that's going to do is act as a little stopper and keep our bead from sliding off. Wwe can make a wrapped loop right above that bead using our round-nose pliers. I'm grasping the wire of my head pin with my round-nose pliers. I'm going to bend the wire toward me ninety degrees, reposition the pliers to the top of that bend, pull the wire up and over at the top jaw of my pliers, reposition the pliers so the bottom jaw is in the loop now, and then I'm going to pull the wire around to finish the loop. I'm going to leave it on my pliers because that's going to make it easier to attach it to the chain. I want to use my chain that I already cut which is the six loop chain, and I'm going to dangle my chain and sort of fish the end of my headpin wire into that last loop. I can nestle the chain down into the loop, so I've got the last link of my chain connected now to that loop that I made. And now I want to wrap the loop. I'm going to use my round-nose pliers. I'm going to grasp across the loop and then pull the tail of my head to the wire around the neck two times. I'm just going to trim the end using my wire cutters. So now we've got our bead attached to our chain. All we have to do is add our earring wire to the top. There's a little loop on the back of our earring wire. I'm going to use my round-nose pliers, and I'm just going to grab on to that little loop and I'm gonna rotate up and rotate the other part of the earring wire down. I can just take my chain and feed that first link of the chain through that earring wire loop and then use my round-nose pliers again to just rotate and close that loop. And there is our first earring. I'm going to repeat all of those steps to create my matching earring. So the first thing I want to do is count out my links again. I want six of my large links. And be careful not to cut through the link that you actually want to use. We'll take our headpin just like we did before and feed on our tiny gold bead. I'm gonna use my round-nose pliers, and I'm going to make a wrapped loop just like I did before. Bend the wire toward me 90 degrees, reposition the pliers to the top of the bend, pull the wire up and over the top jaw, reposition the pliers to the bottom jaw, and then pull the wire around. Now I'm going to take my chain and I'm gonna fish that last link of chain onto the end of my headpin wire. See it's down there in the loop now. And now I can wrap my loop with my round-nose pliers by grasping across the loop and then pulling the neck or the tail of my wire around the neck two times. I'll just trim my wire like I did before. I can open the loop on my earring wire and then sort of fish on the first link of my chain. Nestled that down into the loop and then just do what I did before to close the loop. And there we have a beautiful pair of bead and chain earrings.
If you have any questions about this or any other jewelry making project, leave us a comment and we'll reply. We love helping! Thanks for watching!
Come Craft With Us,
Jennifer & Kitty
We have all kinds of jewelry making videos and lessons. If you enjoy this one, you might also like these jewelry making lessons:
Crystal Wrapped Earrings
https://youtu.be/uNUVJJ0S7WU
Beaded Drop Earrings
https://youtu.be/w_P4nqyWBj8
Handmade Beaded Earrings
https://youtu.be/6ReuKIP1mFo


Comments