Add yourself into any scene - Easy After Effects Tutorial
No green screen needed
As a bonus you will get a special compositiong trick at the end of this tutorial.
You will learn about depth compositing with animating the black levels / output of your footage!
And you will also learn how to create your own presets within after effects.
Track yourself in any scene with Adobe After Effects 2021 - easy 3D Tracking Tutorial
3D Motion Tracking and match moving tutorial with the built in 3D Camera Tracker in After Effects CC 2021
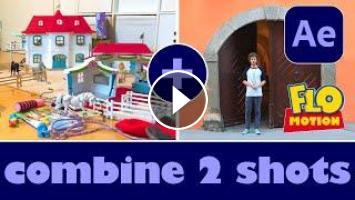
In this After Effects tutorial by flomotion, you will learn how to combine 2 shots into one VFX shot.
This is a famous technique as seen in "wolf of wallstreet" and many other feature films.
This technique is called "NESTING". Therefore you shoot one scene with your actor and "nest" it into another scene, that was maybe shot with a drone, or the second unite, or is simply stock footage.
Learn how to set up both shots, so that they will later match perfectly.
In this easy to follow tutorial lesson you will learn how to stabilize one plate and how to 3D track the other footage to integrate them and compose both of them together on one realistic composition.
Learn some new methods and workflows of masking with different extract and color keys as well as color correct them and bring them to match with color changing, as well as add shadows and highlights and also in this case a "plastic" effect.
Learn how to 3d motion track / match move the scene and create a 3D camera to bring in footage into 3D space.
As a bonus in this tutorial I will show you different methods of roto / rotoscoping in after effects. One will be the new roto brush 2.0 tool and I will also show you the benefits of rotoing with mocha for AE
and how to create shapes out of your mocha tracking data.
This tutorial will be easy to follow with many many handy tips for beginners as I will show you how to set up everything from scratch.
But it will also be super helpful for professionals as well as advanced after effects users, as I will give you insights into a professional workflow from real world projects as well as some tips and tricks along the way.
And as always:
If you have any questions about this tutorial or about after effects or anything about flomotion and my tutorials in general, just leave me a comment and I promise I will answer all of them.
This effect can also be used to shrink yourself as in this example, but you could use any background for this; be it a filmed one, CG (computer generated) or even some comic or painted look works. This comes in perfect if you don't have a big budget.
But of course you can also just adopt this idea and try to recreate Toy Story and play the role of Woody or Buzz Lightyear in the new "Toy Story Real Life"!
Here you find all the EQUIPMENT I used to create my videos as well as my tutorials:
VIDEO EQUIPMENT:
Camera:
Blackmagic Design Pocket Cinema Camera 4K: https://amzn.to/3hDCp5e
Lenses:
Panasonic Leica 8-18 mm F2.8-4.0: https://amzn.to/3fy0dWr
Panasonic Lumix G X Vario 12-35mm F2.8: https://amzn.to/30VGLPg
Monitor:
Feelworld FW 279 4k: https://amzn.to/2N8SpOH
Extra Stuff:
Metabones EF-MFT Speed Booster: https://amzn.to/3hEEldE
PHOTO EQUIPMENT
Camera:
Canon EOS R: https://amzn.to/3fv7rua
Lenses:
Canon RF 24-105mm F4: https://amzn.to/2BmNirG
Canon 50mm F1.8 STM: https://amzn.to/30SWgaE
Extra Stuff:
Canon EF - EOS R Adapter: https://amzn.to/2Bl1IIu
DJI Ronin Gimbal: https://amzn.to/2Bhu6eH
AUDIO EQUIPMENT:
Mic Shure SM7b: https://amzn.to/2UYjpVv
Mic Rode smartLav+: https://amzn.to/3df11xG
Interface Focusrite Scarlett: https://amzn.to/2YdDWHF
Headphones AKG K702: https://amzn.to/2YaLCKw
PC & HARDWARE:
HP ZBook 17: https://amzn.to/2CeBUyd
McBook Pro: https://amzn.to/2UXRN2D
Follow me for more tutorials:
Website:
https://www.flomotion.eu/
Instagram:
https://www.instagram.com/flomotion.eu/
Facebook:
https://www.facebook.com/flomotion.eu/
YouTube:
https://www.youtube.com/flomotionEU




Comments